How to set up Drive DLP in Google Workspace
March 13, 2025
4 minute read

Protecting sensitive data is no longer a “nice-to-have” for businesses; it’s a critical necessity. Today where new data breaches are reported almost every day and regulatory compliance is stringent, organizations must proactively defend their valuable information.
One of the most effective ways to do this is by leveraging Data Loss Prevention (DLP) for your file-sharing environment. Imagine preventing the accidental or malicious sharing of confidential financial records, proprietary intellectual property, or sensitive customer data with just a few clicks. This guide will walk you through setting up Drive DLP, empowering you to take control of your data security and ensure peace of mind.
Getting started: Enable Data scanning and report in the Google Admin Console
Before diving into rule creation, ensure data scanning and reporting are enabled. This allows you to monitor DLP detectors and gain valuable insights.
Step 1. Access the Google Admin Console: Log in using your administrator account.
Step 2. Navigate to Security > Data Protection
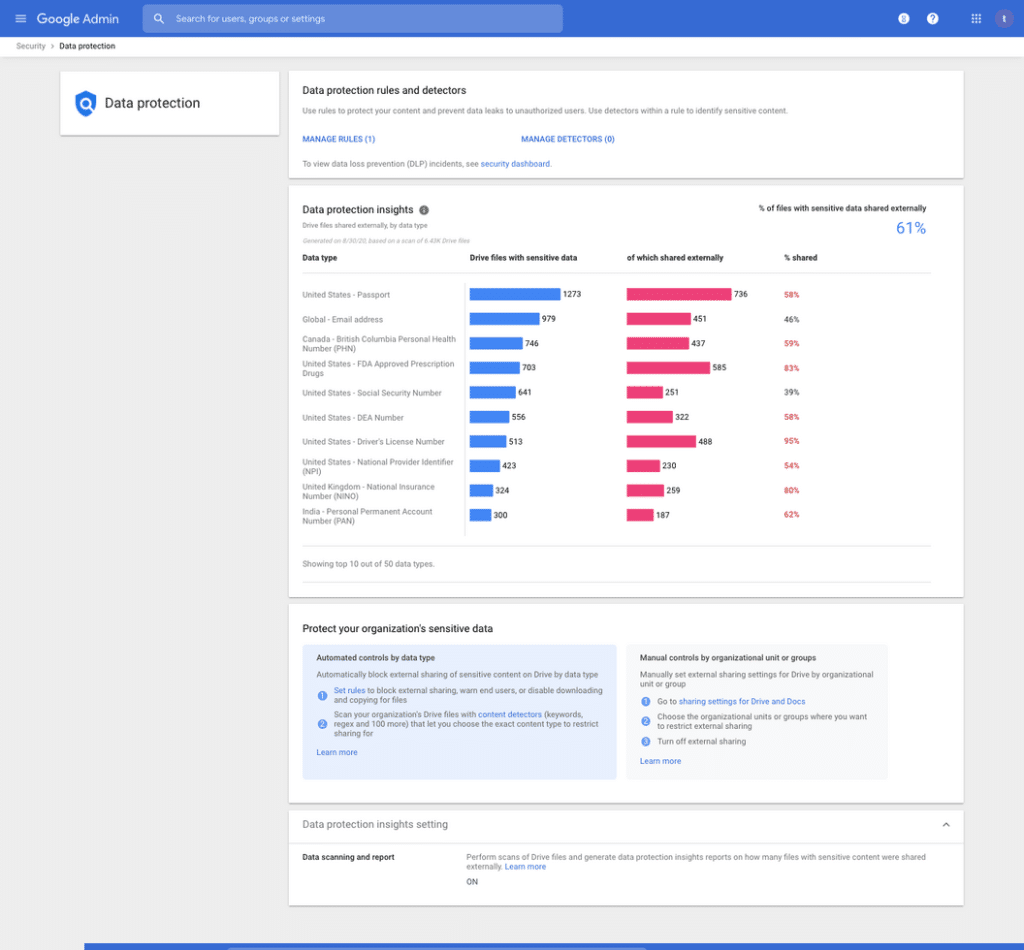
Step 3. Enable Data Scanning and Reporting: At the bottom of the page, enable the Data scanning and report setting to have your DLP detectors reported in the Data Protection Insights Dashboards (see screenshot below). We recommend you keep this setting ON for audit and compliance purposes.
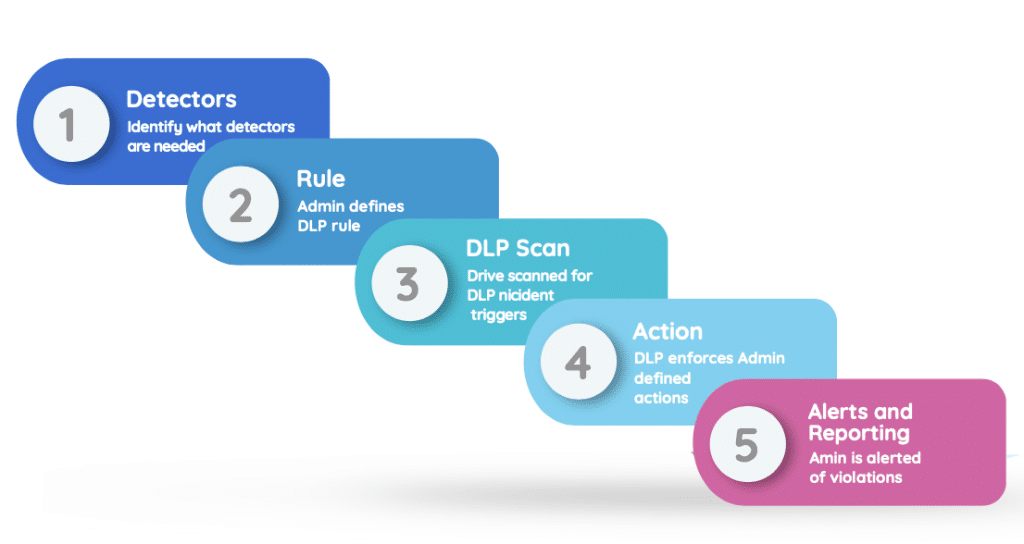
Understanding DLP detectors, rules, and actions
DLP operates through a system of detectors, rules, and actions:
- Detectors: Identify sensitive content (e.g., credit card numbers, keywords).
- Rules: Define when and where detectors are applied.
- Actions: Determine what happens when sensitive content is detected (e.g., alerts, blocking).
Creating custom detectors
- Click Manage Detectors > Add detector
- Select Regular expression or a Wordlist (depending on your needs)
- Name and configure the custom detector
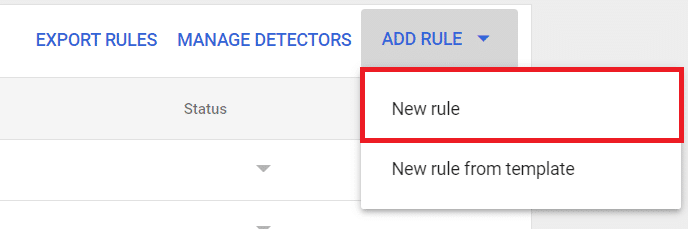
Creating DLP rules
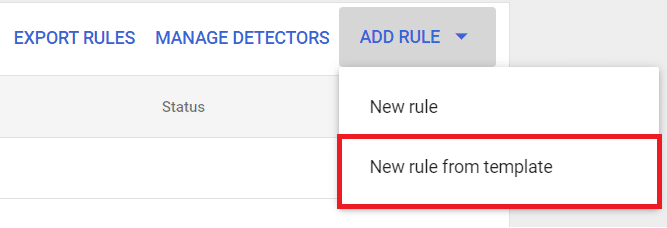
- Go to Manage rules > Add rule
- Select New rule or New rule from template
- Name and define the Scope of your scans (OUs and groups)
- Determine the Triggers of events and set Conditions to define sensitive content as refinement steps.
- Determine the Appropriate Actions (Alert, Action, Severity)
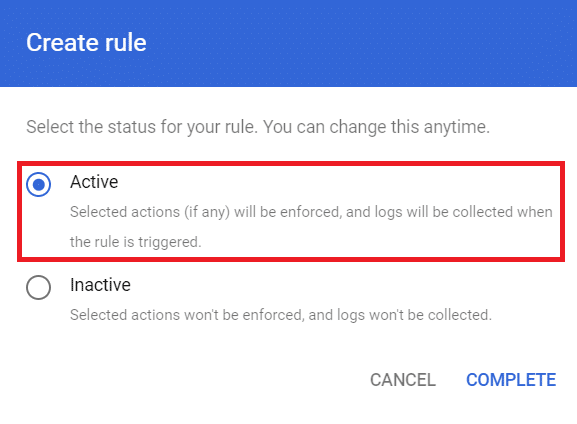
- Review – Lastly, you get to review the rule and choose whether to activate it or not. After that, your rule has been created.
Examples of DLP rules for Google Drive
Although Google has made it easy to implement DLP rules through default detectors and templates, organizations are able to create their own custom rules and detectors. We will cover an example of each DLP configuration below.
1. Protect Credit Card Numbers with default detectors
Step 1: Enter Google Admin Console
Step 2: Access Security > Data Protection > Manage Rule
Step 3: Click Add Rule > New Rule
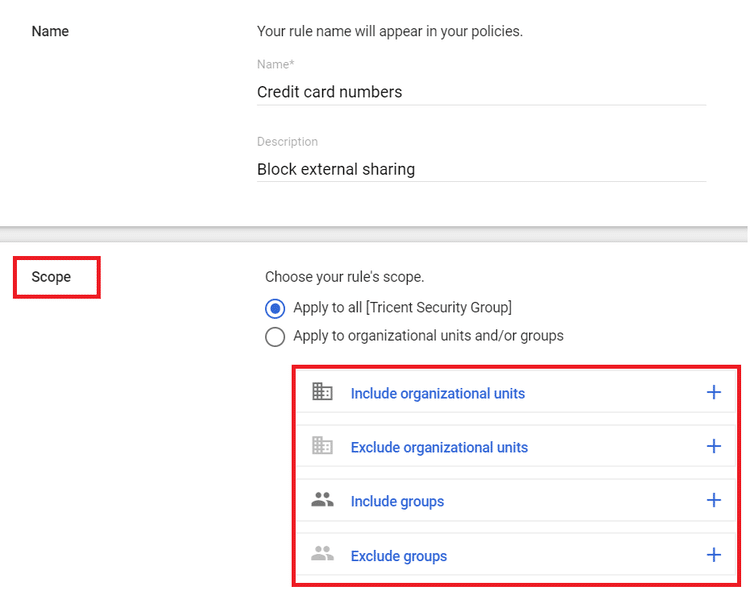
Step 4: Add the name and description for the rule
Step 5: Select the scope of the rule (see screenshot)
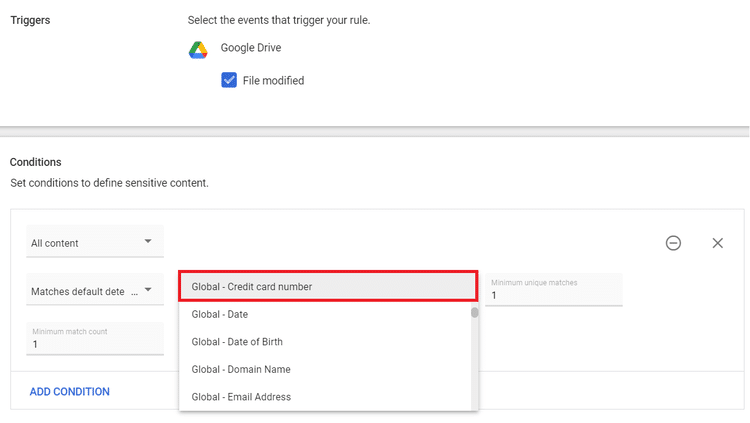
Step 6: Check the File Modified box and add/select: Field– All content
Value – Matches default detector
Default detector – Global – Credit card number
Likelihood Threshold – Possible
Minimum unique matches – 1
Minimum match count – 1

Step 7: Select the Action and the Alerts you want to enforce
Step 8: Review and Create Rule
- Use template to prevent financial information sharing
2. Use template to prevent financial information sharing
Step 1: Enter Google Admin Console
Step 2: Access Security > Data Protection > Manage Rule
Step 3: Click Add Rule > New rule from template
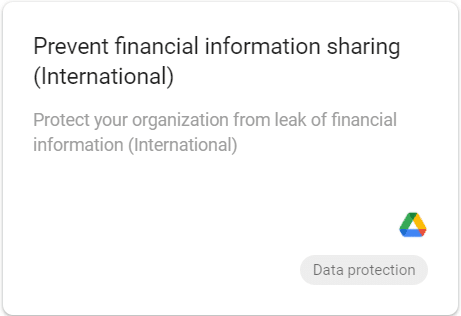
Step 4: Select the template “Prevent financial information sharing”
Step 5: Select the scope of the rule
Step 6: Review the conditions and create the DLP rule
3. Protect files containing sensitive keywords (custom detectors)
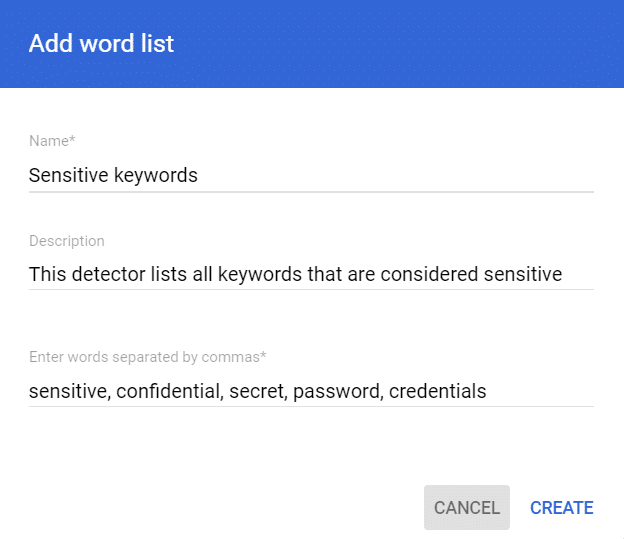
Step 1: Enter Google Admin Console
Step 2: Access Security > Data Protection > Manage Detectors
Step 3: Click Add Detector and select Wordlist
Step 4: Fill out name, description and keywords (see screenshot)
Step 5: Click Manage Rules > New rule
Step 6: Repeat the same process as stated in example 1 and 2.
Pro tip!
- Use the Investigation Tool to view and review the performance of your DLP events and rules (Enterprise only)
- Use the Alert center to get a summary of the DLP alerts you have configured.
Secure your Google Workspace today
You can start your free trial today and gain insight into your file-sharing footprint. (Please note that you must have admin rights to your Google Workspace tenant.)
- Install BetterCloud’s File Governance module directly from Google Workspace Marketplace
- Get instant insight into your external file-sharing footprint.
- Identify potential security risks and analyze sharing patterns.
- Test key functionalities and experience the ease of use.
- Subscribe to access advanced features like automated remediation, custom policy settings, anomaly detection etc.
Don’t leave your sensitive data vulnerable. Implement Drive DLP and consider enhancing it with marketplace solutions to create a robust data security strategy. Choose the option that best suits your needs, and start securing your Google Workspace today!